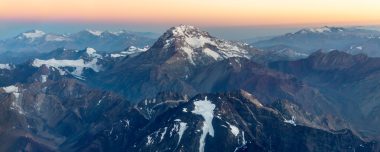
Gear List

Aconcagua Gear List

Alpine Ascents

Overview

  • Each item on the list below is required unless specified to be optional.
  • If seasonal fluctuations impact the requirement for an item on your list, it will be specified.
  • All other items are required regardless of the forecast to ensure your safety and well-being, as weather and conditions can change quickly in the mountains.
  • Item images represent one product suggestion for that item.
  • Item images may or may not reflect the model of item available for rent.

RENTAL RESERVATION INSTRUCTIONS

  • Items with a price & check box may be rented.
  • Check the box of any item you desire to rent.
  • Complete the personal detail section at the bottom of the page, and click submit.
  • If you are a non-Alpine Ascents climber seeking rental equipment, please inquire via email.

FURTHER RESOURCES

  • If you wish to learn more about any piece of gear, the online Gear Lexicon is available 24/7.
  • A printable/downloadable PDF version of the Gear Lexicon may also be accessed here.
  • For in-depth articles, pro-tips, and advice on select subjects, check out our blog.
  • Our experienced staff are happy to speak with you via phone, or via email.
  • The Alpine Ascents Gear Store offers a wide range of products to suit your needs. All registered climbers are welcome to utilize the discount code contained in your confirmation materials.
Print Friendly, PDF & Email

Climbing Equipment

Description
Click to Reserve/Buy Item
Ice Axe

Ice Axe

A general mountaineering ice axe. We recommend the following size as a general guideline to follow. When in doubt, a shorter ice axe is better than a longer axe. Heights 5'4” and under should use a 52 cm axe, 5'5'' to 6’0'' use a 59 cm axe, above 6'0'' use a 66 cm axe. Note that wrist leashes should be removed from your axe. Check out our write-up to learn more about different ice axes.

Crampons

Crampons

General mountaineering crampons. We recommend modern steel 12-point crampons with anti-balling plates. Please do not bring 10-point, aluminum, or single-piece rigid crampons. If you have questions about the suitability of your crampons for your trip, call or email the Gear Department. Check out our write-up to learn more about how to fit your crampons.

Trekking Poles

Trekking Poles

Collapsible trekking poles. A large variety of poles can work well. Three section models are preferred. Snow baskets are not necessary, although smaller trekking baskets can be nice. Basic Black Diamond Trail Poles are sufficient, but more expensive, lighter-weight models such as the Black Diamond Distance Carbon Z Poles offer a greater weight advantage.

Footwear

Description
Click to Reserve/Buy Item
Wool or Synthetic Socks

Wool or Synthetic Socks

Three pairs of medium to heavy hiking socks. These must fit over your liner socks if you plan to wear liner socks.

Double Boots

Double Boots

Double boots designed for mountaineering. Plastic-shelled models are sufficient, but modern non-plastic boots are more comfortable and are highly recommended. Single boots of any kind (boots without a removable liner) will not be sufficient. If using a boot with a built-in gaiter, separate gaiters are not necessary.

Gaiters

Gaiters

Full-sized waterproof gaiters that must fit snugly over your boots. Short trekking gaiters do not offer sufficient protection. If using a boot with a built-in gaiter, separate gaiters are not necessary.

Booties

Booties

Optional. Synthetic or down camp booties for comfortable wear around camp.

Light Hiking Boots or Trekking Shoes

Light Hiking Boots or Trekking Shoes

For any approaches across dry trail. Light weight, high comfort, plenty of room in the toe box, and good support should be stressed here. Street/city style shoes will not be allowed in place of hiking shoes.

Sport Sandals/Water Shoes

Sport Sandals/Water Shoes

For river crossings. Crocs, Teva-style sandals, or similar footwear will work well. Should fit your heel (flip flops will not work).

Technical Clothing

Description
Click to Reserve/Buy Item
Baselayer Bottom

Baselayer Bottom

Non-cotton baselayer bottoms that should fit snugly without constriction. We recommend lighter weight baselayers rather than heavier fleece-type layers. Wool, wool blend, polyester, or other synthetic fabrics all work well. Be sure your baselayer pants are not constructed from cotton.

Baselayer Tops

Baselayer Tops

2-3 long-sleeved base layer tops total. We strongly recommend 1 light-colored sun hoody plus 1-2 other baselayer long-sleeved tops. Wool or synthetic fabrics are required (no cotton). Crew or zip-neck styles are equally useful.

Trekking Pants

Trekking Pants

A pair of lightweight nylon trekking pants. We recommend models that are simple, made with synthetic fabrics, and offer pockets for convenience. Zip-off models are not required, but are preferred by some.

Softshell Pants

Softshell Pants

Stretchy, comfortable, non-insulated softshell pants that should fit comfortably with or without your baselayer bottoms. Please note that "zip-off"-style trekking pants are too light to be considered softshell pants.

Wind Shell (OPTIONAL)

Wind Shell (OPTIONAL)

Used to block wind without adding insulation, many turn to a wind shell or wind shirt for protection. Wind shells typically weigh less than eight ounces and are incredibly packable, which makes them an excellent addition to your layering system. Read more on our blog.

Hardshell Pants

Hardshell Pants

Non-insulated, fully waterproof shell pants that must fit comfortably over your baselayer bottoms and softshell pants. Full-length separating size zippers are generally required; occasionally, 7/8th zippers (extending from the cuff of the pant to the upper hip) can suffice but are strongly advised against. Check out our write-up to learn more.

Softshell Jacket

Softshell Jacket

This breathable but wind-and-weather resistant jacket is a key part of a mountaineering layering system. We recommend a hooded model. This layer must fit well over your midlayer top and baselayer top. Check out our write-up to learn more.

Midlayer Top

Midlayer Top

A midweight, form-fitting, lightweight fleece layer for use over baselayers. Hoods are optional but recommended. Grid fleeces generally provide the best warmth-to-weight ratio. Note that very light puffy jackets can also suffice as a midlayer.

Hardshell Jacket

Hardshell Jacket

A non-insulated, fully waterproof shell jacket with a hood. We recommend durable three-layer fabric. Goretex Pro Shell or a similar eVent fabric will offer the most durability and long-term weather protection. This layer must fit comfortably over your baselayer, midlayer, softshell, and potentially a lightweight insulated layer. Helmet-compatible hoods are required.

Lightweight Insulated Jacket

Lightweight Insulated Jacket

We recommend a lightweight insulated jacket to serve either as a layering piece or as stand-alone insulation when appropriate. This may be filled with down or synthetic insulation.

Expedition Style Down Parka

Expedition Style Down Parka

This expedition style parka should be heavily insulated (minimum 250 grams of down fill weight) with high-quality down fill (800-fill or more). Your expedition style parka must extend below your waist and have an insulated hood. You will want to make sure it fits comfortably over the rest of your upper body layers. We recommend calling to discuss your parka choice, as this item is key to success on any expedition. Down sweaters or light puffy jackets will not be sufficient. Check out our blog post to learn more about down fill power and down fill weight.

Insulated Synthetic Pants

Insulated Synthetic Pants

A synthetic insulated pant with full-length separating side zips. Ski pants are typically not appropriate for this layer.

Handwear

Description
Click to Reserve/Buy Item
Leather Gloves

Leather Gloves

One pair of light leather gloves is strongly recommended for this trip. Tents are setup using large rocks to anchor guylines, and moving rocks can destroy your climbing gloves. Cheap or non-technical leather gloves are sufficient for this item.

Lightweight Liner Gloves

Lightweight Liner Gloves

Very lightweight wool or synthetic liner gloves that offer a snug, comfortable fit. Lighter colors absorb less sunlight while still offering UV protection. Black or dark-color gloves are also acceptable.

Softshell Gloves

Softshell Gloves

Midweight, lightly insulated gloves for use when mittens are too warm and liner gloves are not warm enough. Leather-palm construction is always ideal for the sake of durability. Check out our write-up to learn more.

Insulated Shell Gloves

Insulated Shell Gloves

One pair of warm shell gloves with insulated removable liners. Excellent for use when conditions are too cold for softshell gloves, but too warm for expedition mittens. We recommend models with a durable leather palm.

Expedition Mittens

Expedition Mittens

Expedition-rated mittens with an insulated removable liner. Please be sure this mitten is the warmest model available by any manufacturer.

Headwear

Description
Click to Reserve/Buy Item
Climbing Helmet

Climbing Helmet

A lightweight climbing-specific helmet. This must fit comfortably over your bare head, hat, and/or balaclava, and your headlamp must be able to strap securely to the outside of the helmet. Check out our write-up to learn more about helmets.

Buff

Buff

Two buffs are a must-have. The UV Buff is a versatile replacement for the bandana and serves a multitude of purposes. Check out our write-up to learn more.

Sun Hat

Sun Hat

Any style of lightweight hat for shading the head will work well. Baseball caps and sombrero-style sun hats are the most common.

Balaclava

Balaclava

One mid-to-heavyweight balaclava for face protection in very windy or stormy conditions. Choose a model that will fit comfortably over your head. Models with nose and mouth coverage are required.

Wool/Synthetic Ski Hat

Wool/Synthetic Ski Hat

A non-cotton wool or synthetic hat that covers the head and ears comfortably.

Glacier Glasses

Glacier Glasses

High-quality glacier glasses offering full coverage around both eyes and across the nose. Removable side-shields are not required provided eye coverage is sufficient. For individuals that wear prescription glasses we recommend reading this blog post for tips on eyewear. For guide techniques on how to reduce glacier glasses from fogging check out this post here.

Ski Goggles

Ski Goggles

High-quality goggles for sun and wind protection at altitude. The lens should offer visible light transmission (VLT) of no more than 30%. Those with light-sensitive eyes may wish to use a darker lens. Photochromic models are ideal for use in changing conditions. See here for more.

Dust Mask (Optional)

Dust Mask (Optional)

For those that are sensitive to dust. Can be left at Base Camp.

Headlamp

Headlamp

A modern outdoor LED headlamp offering 200-300 lumens of output. Freshly installed batteries plus spare batteries. Rental headlamps do not include spare batteries. Weather-resistant models are strongly preferred. Check out our write-ups here to learn more.

Personal Equipment

Description
Click to Reserve/Buy Item
NORMAL ROUTE - PACK

NORMAL ROUTE - PACK

For those climbing the Normal Route (or for those pre-booking porters for the entire Vacas Valley itinerary) we recommend a 55-75 liter backpack as your expedition backpack. Expert packers using specialized gear can select a smaller volume pack than those with less experience packing or using less specialized equipment. Do not select too small a pack for your equipment! If opting for a pack smaller than 75 liters, practice packing to be sure you can efficiently use a smaller sized pack.

VACAS VALLEY Route - pack

VACAS VALLEY Route - pack

For those climbing the Vacas Valley Route, bring a 75-105 liter climbing pack designed with climber-specific features and an internal frame. The volume you choose depends on experience level packing and gear quality. If opting for a pack smaller than 100 liters, practice packing to be sure you can efficiently use a smaller sized pack.

Lightweight Day Pack (OPTIONAL)

Lightweight Day Pack (OPTIONAL)

A small, simple pack of approximately 20-40 liters. Useful for the trekking or acclimatization portions, when the larger pack is bigger than necessary.

-20° Fahrenheit Down Sleeping Bag

-20° Fahrenheit Down Sleeping Bag

This sleeping bag should be rated to -20° Fahrenheit and must be down-filled rather than synthetic filled for the sake of weight and bulk. Be sure to include a correctly sized compression stuff sack. Those who sleep cold should strongly consider a -40° Fahrenheit sleeping bag.

(OPTIONAL) Towel & Soap

(OPTIONAL) Towel & Soap

A small packable towel and a small bottle of soap/shampoo can be nice to have, as showers may be purchased at times during the trip.

Foam Pad

Foam Pad

This pad should be either 3/4 or body length. Cut pieces of closed cell foam or industrially-crafted pads are both acceptable.

Inflatable Sleeping Pad

Inflatable Sleeping Pad

A full-length, modern inflatable sleeping pad is recommended. Older-style three-quarter length pads have been superseded by ultralight full-length pads. We recommend bringing a valve repair/body patch kit.

Water Bottle Parkas

Water Bottle Parkas

Bring two fully insulated water bottles parkas with zippered openings. Neoprene 'cozy' style constructions do not provide enough insulation and are not recommended.

Thermos

Thermos

A stainless steel vacuum-sealed thermos with an air tight lid and thermal cup lid. We strongly recommended bringing a thermos for those who prefer hot water to help with hydration on cold mountain days. One-liter sizes are preferred, and avoid narrow-mouthed thermoses which can be challenging to fill.

Hydration Reservoir

Hydration Reservoir

Optional for lower altitude/warmer climate use. Does not serve as a sufficient substitute for water bottles.

Water Bottles

Water Bottles

Two one-liter capacity bottles. Bottles should be wide mouth made of co-polyester (BPA free plastic). No water bag or bladder systems (they freeze or are hard to fill) and no metal bottles (they have a tendency to freeze).

Bowl

Bowl

A sturdy bowl with a sealable lid to keep items hot. We recommend a 16oz Nalgene container with screw top lid. Many of our guides then duct tape a cut foam pad around the container for insulation.

0.5L Nalgene Bottle (OPTIONAL)

0.5L Nalgene Bottle (OPTIONAL)

One 0.5L "baby" Nalgene bottle in lieu of a traditional mug is optional. This is a guide favorite for hot drinks - the leak-proof lid allows you to stick the bottle in your pocket or inside your jacket, keeping it - and you! - warmer. Bottles should be wide mouth made of co-polyester (BPA free plastic).

Pee Bottle

Pee Bottle

Collapsible or hard-sided 1 liter Nalgene models can work well. If opting for a collapsible model, please pick a 1.5-2 liter model as it allows for more space while using in your sleeping bag. For longer expeditions and colder mountains (Everest, Vinson, Denali, etc..) we strongly recommend a hard-sided 1 liter Nalgene as the collapsible models tend to crack in extreme temperatures. Check out our write-up to learn more about pee bottles and funnels.

Knife

Knife

Medium-sized. Keep it simple and light.

Spoon

Spoon

One durable hard plastic or anodized metal spoon. Longer spoon stems can be helpful for eating while wearing gloves.

Mug

Mug

One insulated outdoor-style mug with a removable lid. Your mug should retain heat well and be spill resistant. Models with 12-20 oz capacity generally work best.

Pee Funnel (for Women)

Pee Funnel (for Women)

Optional. Practice is critical for the use of this item. Check out our write-up to learn more about pee funnels and bottles.

Trash Compactor/Contractor Bags

Trash Compactor/Contractor Bags

Three heavy plastic garbage bags for use as waterproof pack/stuff sack liners. Trash compactor or contractor bags are made from a heavier plastic and stand up well to prolonged mountain use. Alternatively, a reusable waterproof pack liner can be used provided it completely fills the inside of your pack.

Camera

Camera

Optional. Small point-and-shoot cameras (including compact SLR's) are ideal & work well at altitude. Alternatively, many opt to use a smartphone camera. Due to weight & care in the mountain environment, large dSLR cameras are discouraged.

Solar Panel + Power Bank (Optional)

Solar Panel + Power Bank (Optional)

Small portable solar panel and power bank for charging personal items like a cell phone on longer trips when access to power is not available. Solar panels with 10-20 charging watts that weigh no more than 2.5lbs are handy, lightweight, and cost-effective. We recommend bringing a small lightweight power bank like the Goal Zero Flip 36 or Venture 35 to store the solar power, and charging your devices directly from this power bank. For more information please see our blog post.

Toiletry Bag

Toiletry Bag

Include toilet paper (stored in a plastic bag), hand sanitizer, toothbrush, toothpaste, floss, and wet wipes. Choose a quantity appropriate for the length of your trip. Female climbers should bring an appropriate amount of feminine hygiene products for the duration of the trip (for international trips, these can be difficult to find last minute in-country).

Water Treatment Tools

Water Treatment Tools

You need to be able to treat two to four liters of water for personal consumption each day. While Steri-Pen purification tools are very popular, climbers are required to bring one set of Aquamira chemical treatment drops or tablets in case your Steri-Pen fails. Treated water will be provided at meals and longer breaks, however climbers need to be prepared to treat their own water during certain rest stops.

Sunscreen

Sunscreen

Two to four ounces of SPF 30+ sunscreen. Varieties with zinc-oxide are more protective! Two to four ounces per week is typically sufficient, but several small tubes can offer insurance against lost or exploded tubes. Sunscreen loses SPF rating over time; we strongly recommend brand-new sunscreen.

Lipscreen

Lipscreen

Several tubes of SPF 30+ lipscreen. As with sunscreen, be sure your lipscreen is new.

Altimeter/Smart Watch (Optional)

Altimeter/Smart Watch (Optional)

Altimeter and Smart Watches are increasingly popular and a great way to track your trip in the field. Models with GPS tracking, altimeter, and activity mode options are most common in addition to having traditional watch features like an alarm clock. Smart watches can be a very helpful tool in training for your climb. For a long trip, we recommend bringing a power bank and charging cable into the field as GPS tracking requires a significant amount of a battery power. For more information on altimeters and smart watches please read our blog post.

Expedition Duffel Bag

Expedition Duffel Bag

An approximately 150-liter expedition-ready duffel bag used to transport all gear. All items need to fit securely into the duffel bag.

Small Personal First-Aid Kit

Small Personal First-Aid Kit

Basic medical supplies in a compact package. We recommend basic painkillers, Moleskin, first-aid tape, Band-Aids, and anti-septic wipes or gel.

Medications & Prescriptions

Medications & Prescriptions

Bring any personal prescriptions, plus Pepto Bismol, Cipro (500mg tablets), Metronidazole, Z-Paks (250mg tablets), Diamox (125mg tablets, approx. 2 per day at altitude), and a variety of standard painkillers like Tylenol, Ibuprofen, cold medicine (Muinex, Tylenol cold +flu, Theraful), etc.

Hand Sanitizer

Hand Sanitizer

Many alcohol-based hand cleaners will work well. Bring a small amount appropriate to the trip duration.

Face Mask

Face Mask

While on the mountain, all climbers are required to have a face mask easily accessible in a waterproof bag (Ziploc, etc.). When social distancing measures are not feasible, you may be requested to wear your mask. Cloth or surgical masks are both acceptable.

Hand and Toe Warmers

Hand and Toe Warmers

Bring three sets of each. Please note that toe warmers are different than hand warmers. They are formulated to work in a lower oxygen environment, like the inside of a boot, they also burn out more quickly.

Supplemental Food - Vacas Valley

Supplemental Food - Vacas Valley

For each day above base camp (other than rest days, when guides prepare hot lunches), we provide some salami, cheese, crackers, and cookies. If you have significant dietary restrictions, please get in touch to discuss your restrictions with us. Bring the following items to supplement the provided foods:

  • (5+) Servings electrolyte replacement mix at your preference (Nuun, Skratch Labs)
  • (3) Energy gels (Gu) or (1-2) packages Clif Shot Bloks
  • (15) Servings instant coffee (if desired!)
  • (20) Energy bars/protein bars/candy bars (Clif Bar, Luna Bar)
  • (1.5) Kilograms trail mix (pick a favorite variety)
  • A small assortment of hard candy, cough drops, etc.
  • Optional:Beef, turkey, or vegan jerky (Extra protein can be nice - note that original packaging is required to avoid trouble at customs)
Supplemental Food - Normal Route

Supplemental Food - Normal Route

For each day above base camp (other than rest days, when guides prepare hot lunches), we provide some salami, cheese, crackers, and cookies. If you have significant dietary restrictions, please get in touch to discuss your restrictions with us. Bring the following items to supplement the provided foods:

  • (5+) Servings electrolyte replacement mix at your preference (Nuun, Skratch Labs)
  • (3) Energy gels (Gu) or (1-2) packages Clif Shot Bloks
  • (12) Servings instant coffee (if desired!)
  • (15) Energy bars/protein bars/candy bars (Clif Bar, Luna Bar)
  • (1) Kilogram trail mix (pick a favorite variety)
  • A small assortment of hard candy, cough drops, etc.
  • Optional:Beef, turkey, or vegan jerky (Extra protein can be nice - note that original packaging is required to avoid trouble at customs)

Traveling

Description
Click to Reserve/Buy Item
Covid-19 Antigen Test Kit

Covid-19 Antigen Test Kit

All climbers must bring two (2) Covid-19 Antigen Testing Kits. Tests are to be used at guides discretion such as the gear check and/or when symptoms arise. We recommend kits like the Abbott BinaxNOW Antigen Self-Test that deliver quick results and are easy to use.

Covid-19 Vaccination Card

Covid-19 Vaccination Card

All climbers must bring a copy of their COVID-19 vaccination card . Please reference the logistics page for protocols and other requirements specific to your trip.

Travel Clothes

Travel Clothes

Clean 'town' clothing is recommend for use traveling as well as pre-and-post trip. We recommend bringing a comfortable variety of clothing for peace of mind, including some t-shirts.

Small Duffel

Small Duffel

This item can double as carry-on luggage for your flight, and is used to store any items you do not plan to take into the mountains. Think light and simple, with 40-50 liters of total capacity. Bring a travel lock for peace of mind.

Travel Power Adapter

Travel Power Adapter

Note that if you wish to charge electronic devices in-country you may need a power adapter. Consult a resource like this guide or call the Gear Department.

Rental Agreement Terms and Conditions

I promise to return all equipment rented from Alpine Ascents International, Inc. in good condition at the end of my climb/course. I agree and authorize Alpine Ascents International, Inc. to charge my credit card on file for repairs and/or replacements of damaged, lost or stolen gear. And I agree not to hold Alpine Ascents International, Inc. responsible for any injuries incurred through the use of its rental equipment.

Rental Information

Reserving: Please submit one reservation per person per departure. We recommend submitting reservations at least one month in advance to ensure adequate time for processing. Incomplete reservations may cause delay or failure to reserve requested items. Cancellations must be made three weeks in advance of your departure.

Washington Rentals: All rental equipment for trips taking place in Washington will be picked up during your gear check at our Seattle headquarters. For trips with an off-site gear check please contact the Gear Department to pick up your rentals in Seattle. At that time, payment will be taken for all rented items. No security deposit will be charged for Washington rentals; however, Alpine Ascents reserves the right to assess fees for the replacement or repair of any damaged items.

Alaska Rentals: Due to the unique nature of Alpine Ascents' Alaska program, some items requested may be picked up in Talkeetna at your gear check rather than shipped directly to you. However, not all rental items are available for pickup in Talkeetna. Payment for Alaska rentals will be charged to the on-file credit card after your gear check, including a $50 security deposit per item. Alpine Ascents reserves the right to withhold all or part of your security deposit for the replacement or repair of damaged items. All equipment, whether shipped to you or picked up in Alaska, may be de-issued at the Alpine Ascents Alaska facility at the end of your trip.

International Rentals: All rental equipment for trips taking place internationally will be shipped to you approximately two weeks prior to your trip departure date. A USA address must be provided for rental shipments. Rental equipment may not be shipped internationally. At the time of shipment, charges will be assessed to the credit card on file, including shipping charges, rental fees, and applicable security deposits. Please immediately contact the Gear Department with any questions.

Confirmation: Allow 48-72 hours for rental confirmation via email. If you have any questions or have not heard back from us within three (3) working days, please email [email protected] or call (206) 378-1927 and ask for the Gear Department.

Payment: The credit card on file will be used to process rental payment. For climbs in Washington, payment will be taken at your gear check and no security deposit will be required. For climbs taking place outside of Washington, charges are processed at the time of shipment (approximately two weeks prior to departure date) and will include a $50 security deposit per item plus shipping. Shipping cost is based on size and weight and can only be determined at the time of shipment.

Security Deposit: Fees are fully refundable upon a timely return (one week from the end of trip). Fees may be assessed for repair or replacement of damaged item(s). Please allow up to two weeks for your refunded to be credited. Please note that for items not returned within one week after a trip end date Alpine Ascents reserves the right to withhold all or part of your security deposit.

Shipment: Rental items for climbs taking place outside of Washington are scheduled to ship two weeks prior to your trip departure. Once received, please verify that all items are correct and fit appropriately. Please note that sizing information provided is used to determine the sizes of items shipped. You are responsible for rentals once items are shipped and until items are received back at Alpine Ascents. We encourage you to insure your shipment.

Four Bags, Six Stages, One Expedition

This expedition is logistics-heavy. The best way to have a comfortable, smooth trip is to understand ahead of time how you’ll pack and move your gear around Argentina. You need four different types of luggage for this trip:

  • Expedition Backpack – big, comfortable, and ready to hold all of your gear on the upper mountain.
  • Expedition Duffel Bag – the biggest, burliest duffel available. Think 150-liters in size.
  • Trekking Backpack – 30-40 liters, enough to carry light snacks, layers, and water.
  • Small Duffel – carry-on luggage of any kind that isn’t hard-sided nor wheeled.

How do these four kinds of luggage work together? Read below to understand the trip flow through all six stages of the expedition.


Stage 1 – Travel to Argentina

Pack everything (except for a few items mentioned below) into your expedition duffel and check it in with your airline. Your expedition pack and trekking pack should be flat-packed inside of the duffel bag.

Pack your small duffel as your carry-on, being sure to include any usual comfort items for international air travel. Staying relaxed in the days prior to your expedition will contribute to your success on Aconcagua! Pro tip: we typically fly with our high-altitude boots and our insulated pants in our carry-on baggage. These items are nearly impossible to replace in Mendoza, while other gear list items can be found in local shops.


Stage 2 – Trip Prep in Mendoza

You’ve arrived to beautiful, sunny, Mendoza! Here, we take the time to do a thorough gear check, among other pre-trip duties. For those staying extra days on the front or back end of the expedition, don’t forget to pack some warm-weather clothes. Climbing season often brings temperatures of 100°F to Mendoza and the surrounding countryside, although it can be easy to forget this if you are traveling from a Northern Hemisphere location where snow is falling!

After our gear check, we’ll pack as outlined below:

  • Small duffel – in this duffel, which is left in Penitentes, pack a set (or two) of town clothes and perhaps a small bottle of a favorite shampoo. Any other “nice” items you will want immediately after exiting Aconcagua Provincial Park should be packed into this duffel.
  • Trekking pack – your “day 1” trekking clothes and footwear go in this bag, along with your water bottles, trekking poles, hydration mixes for your water bottles, some extra snacks, camera, and a few layers sufficient for an all-day trek. Your guides will assess the weather forecast and give specific coaching.
  • We flat-pack our expedition backpack into the bottom of our expedition duffel along with every other expedition item. Anything that goes in this duffel will soon be inaccessible during each day’s travels, so consider carefully anything you pack into it.
  • Any valuables or other luggage can be stored with the Park Hyatt (or your hotel) – we do not recommend bringing laptops beyond Mendoza, for example. If you plan to store large amounts of gear or clothing at the hotel during the expedition, you may wish to bring a fifth bag/duffel for this purpose.

Stage 3 – Penitentes

A few hours from Mendoza by bus is a tiny mountain town called Penitentes. We drop our expedition duffels with the arrieros (mule drivers), and do not have access to them again until we arrive at camp the following night.

After weighing our duffels, we check into a small hotel with only the items packed into our trekking pack and small duffel remaining. There’s no retrieving items from your expedition duffel at this point – be sure to pack your prescriptions, contact lenses, and phone charger in other luggage!


Stage 4 – Trekking to Base Camp

After a night in Penitentes, we check our small duffels into hotel storage, bus to the trailhead, and begin trekking to base camp. Until we reach camp for the night, the only equipment with us what we packed into our trekking pack.

Whether climbing via the Vacas Valley or Normal Route, once we reach camp each day we will be reunited with our full expedition duffel and the remainder of our gear. Each morning, we zip up and turn our duffel over to the arrieros. Note that Aconcagua can be dusty and that mules are not kind to equipment. Pick a heavy-duty expedition duffel!


Stage 5 – Base Camp

After a few days’ trek, we reach base camp, a remarkable mini tent-city. The experience is similar in many ways to Everest’s base camp, albeit at a slightly lower altitude. At base camp, we have constant access to our expedition duffels, and begin to acclimatize for the upper mountain.

Here, we begin using our expedition packs to cache gear at Camp I. After a few nights, we pack our packs, and prep to leave our expedition duffels behind while we live out of backpacks on the upper mountain. These duffels are stored at camp for us, or ported around the mountain for those climbing via the Vacas Valley, which is completed as a traverse from Plaza Argentina base camp to Plaza de Mulas base camp.


Stage 6 – Upper Mountain

On the upper mountain, only our expedition backpacks and gear contained within them remain. All of our other luggage, like bread crumbs, traces our journeys all the way back to Mendoza.

Weather and conditions permitting, after celebrating summit success, we descend to base camp where we regain our expedition duffels. Our packing process is reversed on our exit, all the way back to the city of Mendoza.


I had a fantastic time. Everything exceeded by expectations from the accommodations to the the food to the company. The climb was challenging and thrilling and I felt supported by my guides every step of the way. I walked away confident that I will do another big expedition in the near future. Alpine is so lucky to have such unreal staff.

Aconcagua BLOG

  • 2022 Aconcagua Webinar

    If your 2022 winter plans include climbing the Stone Sentinel, check out the webinar we hosted on October 4th.  Lead Aconcagua Guide, Rachel Molstad, outlined both climbing routes and what to expect on the expedition.   Our Gear Manager, Ciara Sampaio, walked us through gear considerations along with helpful information on porters, money, and pre-trip logistics.  […]

  • Is My Training Working?

    Is my training working? Whether explicitly spoken or implied, this is the question many climbers ask of themselves, their friends, and perhaps their guides. At Alpine Ascents, we hear this question weekly. While the best answer to this question requires a comprehensive understanding of you and your objective, there are simpler ways to get a […]

  • Not on the Gear List, But in our Backpacks

    Off-List Must-Haves Gear lists are honed utilitarian tools for packing for a trip. Our gear lists represent years of carefully considering only and exactly what is needed for a given climb. You might wonder: are there things worth bringing into the mountains, not on our gear lists? Absolutely! Loaded Smartphone (the Electronic Multi-Tool) A smartphone […]

Partners & Accreditations

Alpine Ascents International is an authorized mountain guide service of Denali National Park and Preserve and Mount Rainier National Park.
© Copyright 2023 All Rights Reserved. Alpine Ascents International