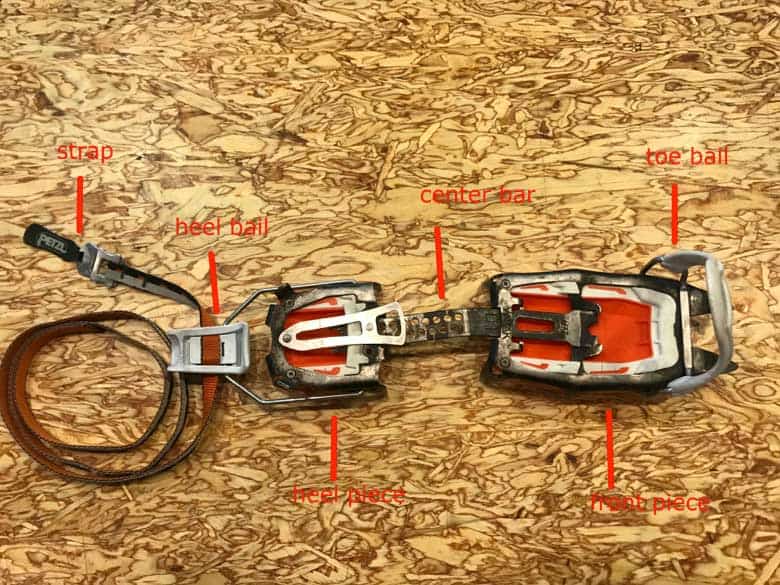
Crampon anatomy 101
Fitting crampons correctly can be a challenge for new climbers. The good news is that a few simple steps make the process of fitting crampons to your boots easy- and most importantly – effective.
Step 1: Length Adjustment
The first step towards getting a secure attachment between your boots and crampons is adjusting the length of the crampons to the appropriate size for your boot. Almost all modern crampons will do this using a pin-lock system on the center bar – simply pull the pin up, slide the center bar to the length desired, and let go. (Make sure you are adjusting the correct crampon for the boot! Crampons are asymmetrical- there should be a ‘Right’ or ‘Left’ printed on the center bar, and the buckle for the strap should end up on the outside of your foot.)
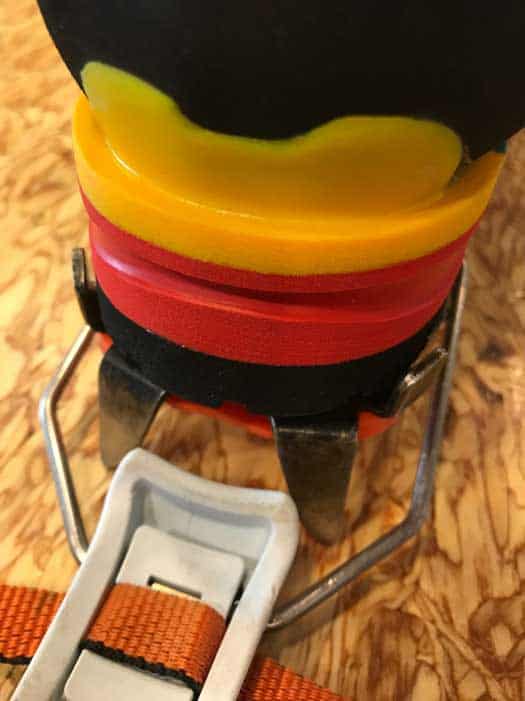
We are looking for as tight a fit as possible. This means that, starting with the toe of the boot in the front of the crampon, we want the heel piece of our crampons to fit snugly against the heel of our boot.
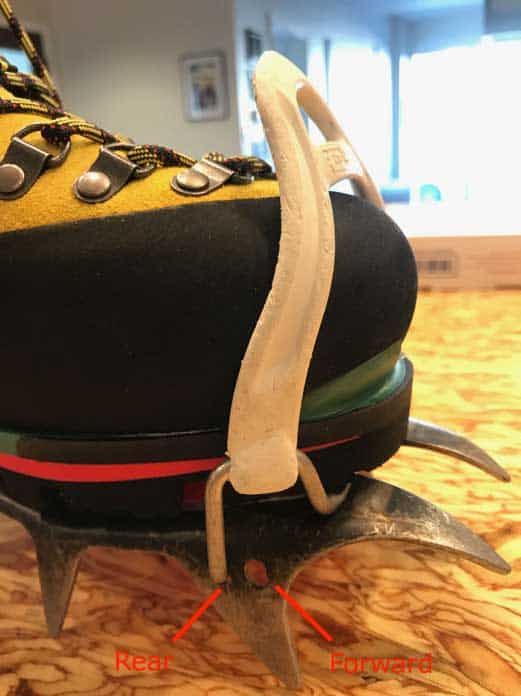
Depending on the size of your boot, you may find that you need to adjust the toe bail forward or backwards in order to have the correct positioning of the toe of your boot over the front points on your crampon. For a single boot like we have here, the rearmost toe bail attachment point provides the best position. If you have larger feet or are using double boots, you may find that the forward position gives a better position for the front points.
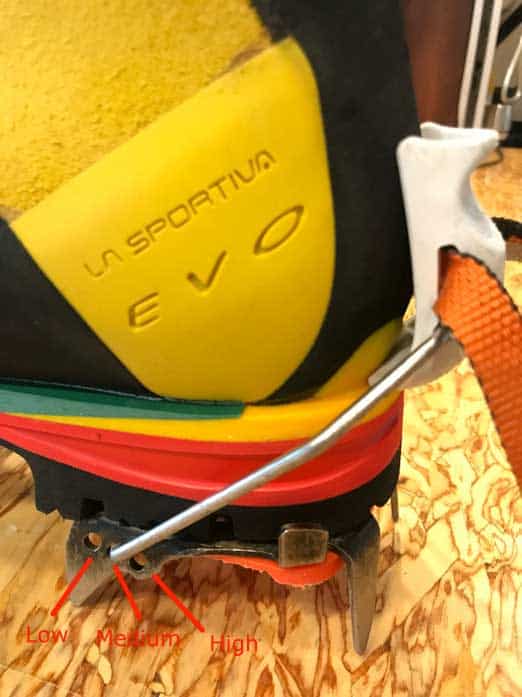
Step 2: Height Adjustment
Now that our crampons are the right length, we need to make sure the heel throw is at the correct height for a secure fit (note: if you are using strap-on style crampons, this step won’t be necessary). This step is slightly based on feel – you need to find the heel bail positioning that provides a secure *snap* into place, without being so tight that it’s difficult to engage. We find that the middle bail position provides a secure throw without being too difficult to engage.
Some crampon models have an adjustment dial within the heel throw, if that’s the case you can simply adjust the dial until you find a good level of tension.
Step 3: Strap Adjustment
The straps help hold the toe and heel throw in place, but if you’ve adjusted your crampons correctly, they should hold to your boot without the strap. Now is a great time to pick up the whole boot and see if your attachment is snug. If the crampon stays attached, you’ve done well!
To secure the strap and make the whole package ready for field use, simply take the long tail of your strap, run it forward through the toe strap hole, then back to the D-rings on the outside of your boot (if your buckles are on the inside of your boot, go back to step 1 and make sure you have the crampon on the correct boot!). Pull the strap tight, tie off the excess or tuck it in your gaiter, and you’re good to go!