Gear List

Mount Vinson Gear List

Alpine Ascents

Overview

  • Each item on the list below is required unless specified to be optional.
  • If seasonal fluctuations impact the requirement for an item on your list, it will be specified.
  • All other items are required regardless of the forecast to ensure your safety and well-being, as weather and conditions can change quickly in the mountains.
  • Item images represent one product suggestion for that item.
  • Item images may or may not reflect the model of item available for rent.

RENTAL RESERVATION INSTRUCTIONS

  • Items with a price & check box may be rented.
  • Check the box of any item you desire to rent.
  • Complete the personal detail section at the bottom of the page, and click submit.
  • If you are a non-Alpine Ascents climber seeking rental equipment, please inquire via email.

FURTHER RESOURCES

  • If you wish to learn more about any piece of gear, the online Gear Lexicon is available 24/7.
  • A printable/downloadable PDF version of the Gear Lexicon may also be accessed here.
  • For in-depth articles, pro-tips, and advice on select subjects, check out our blog.
  • Our experienced staff are happy to speak with you via phone, or via email.
  • The Alpine Ascents Gear Store offers a wide range of products to suit your needs. All registered climbers are welcome to utilize the discount code contained in your confirmation materials.
Print Friendly, PDF & Email

Climbing Equipment

Description
Click to Reserve/Buy Item
Waist Leash

Waist Leash

To be used with your ice axe, a commercial waist leash is designed to keep your ice axe attached to you even in the event that you drop it while climbing or taking a break. Note that only waist leashes will work - no wrist leashes!

Ice Axe

Ice Axe

A general mountaineering ice axe. We recommend the following size as a general guideline to follow. When in doubt, a shorter ice axe is better than a longer axe. Heights 5'4” and under should use a 52 cm axe, 5'5'' to 6’0'' use a 59 cm axe, above 6'0'' use a 66 cm axe. Note that wrist leashes should be removed from your axe. Check out our write-up to learn more about different ice axes.

Accessory Cord

Accessory Cord

40 feet of 6mm accessory cord to be used for prussiking and other climbing rigging. If you plan to bring your own pre-tied prussiks, please contact the Gear Department ahead of time. You will need cord for more than just prussiks. Make sure the cord is soft, flexible and supple. Stiff and rigid cord will not work. To test this, hold the final 12-inch/30-cm piece of the cord in the air, with your hand below. If the cord stands up straight (stalagmite style) it will not work.

Carabiners

Carabiners

Please bring (2) large auto-locking carabiners for use with your harness, and (6) non-locking carabiners (wiregate or standard are both OK).

Crampons

Crampons

General mountaineering crampons. We recommend modern steel 12-point crampons with anti-balling plates. Please do not bring 10-point, aluminum, or single-piece rigid crampons. If you have questions about the suitability of your crampons for your trip, call or email the Gear Department. Check out our write-up to learn more about how to fit your crampons.

Alpine Climbing Harness

Alpine Climbing Harness

Your harness must fit over all of your clothing, feature gear loops, adjustable leg loops and waist belt, and must be able to fully separate at the legs . We strongly recommend newer models with a belay loop and which do not require "doubling back" your waist belt - older models are cumbersome. Check out our write-up to learn more.

Trekking Poles

Trekking Poles

Collapsible skiing/trekking poles with snow baskets. Three-section varieties are preferred.

Ascender

Ascender

One right or left-handed ascender (pick your dominant hand to choose which style ascender). This item must be in good condition.

Footwear

Description
Click to Reserve/Buy Item
Wool or Synthetic Socks

Wool or Synthetic Socks

Three pairs of medium to heavy hiking socks. These must fit over your liner socks if you plan to wear liner socks.

High-Altitude Double Boot

High-Altitude Double Boot

Double boots. Plastic-shelled models are sufficient, but modern non-plastic boots are more comfortable and are highly recommended. Single boots of any kind (boots without a removable liner) will not be sufficient. If using a boot with a built-in gaiter, separate gaiters are not necessary. If using an all-in-one high altitude boot (e.g. Olympus Mons), overboots and gaiters are not necessary.

Insulated Overboots

Insulated Overboots

Below the knee length neoprene overboot. Should fit tightly over your boots and work well with your crampons. Necessary when using a high-altitude double-boot system. Not necessary for use with a high-altitude all-in-one boot system. Make sure your crampons are compatible with your overboots (strap on crampons).

High-Altitude All-in-One Boot

High-Altitude All-in-One Boot

Used instead of standard double-boot, this all-in-one integrated boot system is warm enough for use without overboots, and eliminates the need for gaiters. If using triple boots, full strap-on crampons fit better than semi-automatic or fully automatic crampons.

Booties

Booties

Synthetic or down camp booties for comfortable wear around camp.

Waterproof Snow Boots (Optional)

Waterproof Snow Boots (Optional)

Waterproof winter snow boots are optional. These can be a nice addition for base camp and incase of a weather delay at Union Glacier. They are NOT a substitute for your mountaineering boots. Models that have a built-in gaiter, removeable liner and insulated to -40F are best. Common models our guides recommend are the Sorel Glacier XT, Baffin Impact or Endurance.

Technical Clothing

Description
Click to Reserve/Buy Item
Short Underwear

Short Underwear

Two to three pairs including the pair you are wearing on Day 1. Synthetic or wool fabrics only - no cotton! Bring comfortable athletic styles based on your needs and preferences (e.g., boxers, briefs, sports bras).

Baselayer Bottom

Baselayer Bottom

Non-cotton baselayer bottoms that should fit snugly without constriction. We recommend lighter weight baselayers rather than heavier fleece-type layers. Wool, wool blend, polyester, or other synthetic fabrics all work well. Be sure your baselayer pants are not constructed from cotton.

Heavy Baselayer Bottoms

Heavy Baselayer Bottoms

Heavy, expedition-weight baselayer bottoms designed to be used while climbing in very cold conditions. Fabrics such as Polartec Power Stretch, Capilene 4, and Polartec Power Dry will work well.

Long Sleeve Sun Shirt

Long Sleeve Sun Shirt

One long-sleeved base layer top. This item must be constructed of a non-cotton material such as merino wool or polyester. Note that light-colored, hooded sun shirts are strongly recommended for sun protection, and are worn by guides throughout most climbs.

Second Baselayer Top

Second Baselayer Top

A second non-cotton baselayer top. Wool or synthetic fabrics are required. Short or long sleeve acceptable, though we recommend long sleeve.

Softshell Pants

Softshell Pants

Stretchy, comfortable, non-insulated softshell pants that should fit comfortably with or without your baselayer bottoms. Please note that "zip-off"-style trekking pants are too light to be considered softshell pants.

Softshell Jacket

Softshell Jacket

This breathable but wind-and-weather resistant jacket is a key part of a mountaineering layering system. We recommend a hooded model. This layer must fit well over your midlayer top and baselayer top. Check out our write-up to learn more.

Midlayer Top

Midlayer Top

A midweight, form-fitting, lightweight fleece layer for use over baselayers. Hoods are optional but recommended. Grid fleeces generally provide the best warmth-to-weight ratio. Note that very light puffy jackets can also suffice as a midlayer.

Lightweight Insulated Jacket

Lightweight Insulated Jacket

We recommend a lightweight insulated jacket to serve either as a layering piece or as stand-alone insulation when appropriate. This may be filled with down or synthetic insulation.

Expedition Down Parka

Expedition Down Parka

An 8000-meter rated, expedition ready parka. This parka must be in excellent condition, fully baffled, and should be recently cleaned with Nikwax Down Wash to ensure maximum loft. We recommend calling to discuss your parka choice, as this item is key to success on any expedition.

No One-Piece Suits

No One-Piece Suits

Please note that one-piece down suits are NOT appropriate for this trip. Do not bring a down suit; instead, bring an expedition parka and insulated synthetic pants. Down suits will not be allowed on this trip.

Insulated Synthetic Pants

Insulated Synthetic Pants

A synthetic insulated pant with full-length separating side zips. Ski pants are typically not appropriate for this layer.

Handwear

Description
Click to Reserve/Buy Item
Lightweight Liner Gloves

Lightweight Liner Gloves

Very lightweight wool or synthetic liner gloves that offer a snug, comfortable fit. Lighter colors absorb less sunlight while still offering UV protection. Black or dark-color gloves are also acceptable.

Softshell Gloves

Softshell Gloves

Midweight, lightly insulated gloves for use when mittens are too warm and liner gloves are not warm enough. Leather-palm construction is always ideal for the sake of durability. Check out our write-up to learn more.

Insulated Shell Gloves

Insulated Shell Gloves

One pair of warm shell gloves with insulated removable liners. Excellent for use when conditions are too cold for softshell gloves, but too warm for expedition mittens. We recommend models with a durable leather palm.

Expedition Mittens

Expedition Mittens

Expedition-rated mittens with an insulated removable liner. Please be sure this mitten is the warmest model available by any manufacturer.

Headwear

Description
Click to Reserve/Buy Item
Climbing Helmet

Climbing Helmet

A lightweight climbing-specific helmet. This must fit comfortably over your bare head, hat, and/or balaclava, and your headlamp must be able to strap securely to the outside of the helmet. Check out our write-up to learn more about helmets.

Buff

Buff

A must-have for all outdoor activities, the UV Buff is a versatile replacement for the bandana and serves a multitude of purposes. Check out our write-up to learn more.

Sun Hat

Sun Hat

Any style of lightweight hat for shading the head will work well. Baseball caps and sombrero-style sun hats are the most common.

Balaclava System

Balaclava System

Two full balaclavas, one heavyweight and one lightweight, that will comfortably layer together. These items are not replaced by a Buff.

Wool/Synthetic Ski Hat

Wool/Synthetic Ski Hat

A non-cotton wool or synthetic hat that covers the head and ears comfortably.

Facemask

Facemask

Breathable models are recommended; be sure your face mask is sized well to your face. Guides recommend the Outeru Faceglove for its breathability and anti-fogging capability. Balaclavas with built-in face masks also work well.

Glacier Glasses

Glacier Glasses

High-quality glacier glasses offering full coverage around both eyes and across the nose. Removable side-shields are not required provided eye coverage is sufficient. For individuals that wear prescription glasses we recommend reading this blog post for tips on eyewear. For guide techniques on how to reduce glacier glasses from fogging check out this post here.

Ski Goggles

Ski Goggles

High-quality goggles for sun and wind protection at altitude. The lens should offer visible light transmission (VLT) of no more than 30%. Those with light-sensitive eyes may wish to use a darker lens. Photochromic models are ideal for use in changing conditions. See here for more.

Nose Guard

Nose Guard

Nose guards are optional, but can be useful for those with extra-sensitive noses in lieu of constant sunscreen application. Guides strongly recommend the Outeru face glove as a nose guard.

Personal Equipment

Description
Click to Reserve/Buy Item
Expedition Climbing Pack

Expedition Climbing Pack

A 75-100 liter climbing pack designed with climber-specific features and an internal frame. The volume you choose depends on experience level packing and gear quality. If opting for a pack smaller than 100 liters, practice packing to be sure you can efficiently use a smaller sized pack.

-40° Fahrenheit Down Sleeping Bag

-40° Fahrenheit Down Sleeping Bag

This sleeping bag should be appropriately rated to -40° Fahrenheit. Down bags are a must, synthetic bags are overly bulky and heavy when rated below 0° Fahrenheit.

In Flight Carry-On Pack

In Flight Carry-On Pack

For your flight to Antarctica, a SMALL backpack or bag is necessary. We recommend an approximately 25-30 liter stuffable/compressible pack. You will carry gloves, mittens, a warm hat, sunscreen, goggles, prescriptions, and your passport in this pack. To fit beneath the seats of the plane, the pack must not exceed 18" (H) x 10" (W) x 16" (D). See 'Luggage Logistics' above for more information.

Inflatable Sleeping Pad

Inflatable Sleeping Pad

A full-length, modern inflatable sleeping pad is recommended. Older-style three-quarter length pads have been superseded by ultralight full-length pads. We recommend bringing a valve repair/body patch kit.

Foam Pad

Foam Pad

This pad should be either 3/4 or body length. Cut pieces of closed cell foam or industrially-crafted pads are both acceptable.

Thermos

Thermos

A stainless steel vacuum-sealed thermos with an air tight lid and thermal cup lid. We strongly recommended bringing a thermos for those who prefer hot water to help with hydration on cold mountain days. One-liter sizes are preferred, and avoid narrow-mouthed thermoses which can be challenging to fill.

Water Bottle Parkas

Water Bottle Parkas

Bring two fully insulated water bottles parkas with zippered openings. Neoprene 'cozy' style constructions do not provide enough insulation and are not recommended.

Water Bottles

Water Bottles

Bring two one-liter capacity hard-sided water bottles. Wide-mouth, BPA-free plastic bottles are ideal. Nalgene brand bottles are recommended. No water bag or bladder systems (they freeze or are hard to fill) and no metal bottles (they have a tendency to freeze).

Spoon

Spoon

One durable hard plastic or anodized metal spoon. Longer spoon stems can be helpful for eating while wearing gloves.

0.5L Nalgene Bottle (OPTIONAL)

0.5L Nalgene Bottle (OPTIONAL)

One 0.5L "baby" Nalgene bottle in lieu of a traditional mug is optional. This is a guide favorite for hot drinks - the leak-proof lid allows you to stick the bottle in your pocket or inside your jacket, keeping it - and you! - warmer. Bottles should be wide mouth made of co-polyester (BPA free plastic).

Bowl

Bowl

A sturdy bowl with a sealable lid to keep items hot. We recommend a 16oz Nalgene container with screw top lid. Many of our guides then duct tape a cut foam pad around the container for insulation.

Knife

Knife

Medium-sized. Keep it simple and light.

Pee Bottle

Pee Bottle

Collapsible or hard-sided 1 liter Nalgene models can work well. If opting for a collapsible model, please pick a 1.5-2 liter model as it allows for more space while using in your sleeping bag. For longer expeditions and colder mountains (Everest, Vinson, Denali, etc..) we strongly recommend a hard-sided 1 liter Nalgene as the collapsible models tend to crack in extreme temperatures. Check out our write-up to learn more about pee bottles and funnels.

Mug

Mug

One insulated outdoor-style mug with a removable lid. Your mug should retain heat well and be spill resistant. Models with 12-20 oz capacity generally work best.

Pee Funnel (for Women)

Pee Funnel (for Women)

Optional. Practice is critical for the use of this item. Check out our write-up to learn more about pee funnels and bottles.

Trash Compactor/Contractor Bags

Trash Compactor/Contractor Bags

Three heavy plastic garbage bags for use as waterproof pack/stuff sack liners. Trash compactor or contractor bags are made from a heavier plastic and stand up well to prolonged mountain use. Alternatively, a reusable waterproof pack liner can be used provided it completely fills the inside of your pack.

Camera

Camera

Optional. Small point-and-shoot cameras (including compact SLR's) are ideal & work well at altitude. Alternatively, many opt to use a smartphone camera. Due to weight & care in the mountain environment, large dSLR cameras are discouraged.

Solar Panel + Power Bank (Optional)

Solar Panel + Power Bank (Optional)

Small portable solar panel and power bank for charging personal items like a cell phone on longer trips when access to power is not available. Solar panels with 10-20 charging watts that weigh no more than 2.5lbs are handy, lightweight, and cost-effective. We recommend bringing a small lightweight power bank like the Goal Zero Flip 36 or Venture 35 to store the solar power, and charging your devices directly from this power bank. For more information please see our blog post.

Toiletry Bag

Toiletry Bag

Include toilet paper (stored in a plastic bag), hand sanitizer, toothbrush, toothpaste, floss, and wet wipes. Choose a quantity appropriate for the length of your trip. Female climbers should bring an appropriate amount of feminine hygiene products for the duration of the trip (for international trips, these can be difficult to find last minute in-country).

Sunscreen

Sunscreen

Two to four ounces of SPF 30+ sunscreen. Varieties with zinc-oxide are more protective! Two to four ounces per week is typically sufficient, but several small tubes can offer insurance against lost or exploded tubes. Sunscreen loses SPF rating over time; we strongly recommend brand-new sunscreen.

Lipscreen

Lipscreen

Several tubes of SPF 30+ lipscreen. As with sunscreen, be sure your lipscreen is new.

Altimeter/Smart Watch (Optional)

Altimeter/Smart Watch (Optional)

Altimeter and Smart Watches are increasingly popular and a great way to track your trip in the field. Models with GPS tracking, altimeter, and activity mode options are most common in addition to having traditional watch features like an alarm clock. Smart watches can be a very helpful tool in training for your climb. For a long trip, we recommend bringing a power bank and charging cable into the field as GPS tracking requires a significant amount of a battery power. For more information on altimeters and smart watches please read our blog post.

Sled Duffel Bag

Sled Duffel Bag

An approximately 150-liter expedition-ready duffel bag used to transport all gear on your sled during the trip. The duffel needs to be fully waterproof and durable. Choose a model like the North Face Base Camp duffel with specific sled tie-down points. This bag can also be used to travel with gear to and from your destination.

Small Personal First-Aid Kit

Small Personal First-Aid Kit

Basic medical supplies in a compact package. We recommend basic painkillers, Moleskin, first-aid tape, Band-Aids, and anti-septic wipes or gel.

Medications & Prescriptions

Medications & Prescriptions

Bring any personal prescriptions, plus Pepto Bismol, Cipro (500mg tablets), Z-Paks (250mg tablets), Diamox (125mg tablets, approx. 2 per day at altitude), and a variety of standard painkillers like Tylenol, Ibuprofen, etc.

Face Mask (Optional)

Face Mask (Optional)

We recommend that all climbers have a face mask easily accessible in a waterproof bag (Ziploc, etc.).

Hand Sanitizer

Hand Sanitizer

Many alcohol-based hand cleaners will work well. Bring a small amount appropriate to the trip duration.

Hand and Toe Warmers

Hand and Toe Warmers

Bring three sets of each. Please note that toe warmers are different than hand warmers. They are formulated to work in a lower oxygen environment, like the inside of a boot, they also burn out more quickly.

Food

Food

All the food for this trip is provided, but bring any snacks or other food and drink items you wouldn’t want to climb without!

Please let us know in advance if you have any food allergies we should be aware of.

Vinson Additional Clothing

Vinson Additional Clothing

For this expedition, we strongly recommend packing one additional set of clothing to fly to Vinson base camp. This fresh set of clothing can be nice to change into incase of a weather delay with flights at base camp or Union Glacier. We recommend one pair of socks, underwear, base layer top and bottom. Please keep this set light and simple as we are restricted by flight weights into Antarctica

Ski the Last Degree Kit

Ski the Last Degree Kit

ONLY for those also Skiing the Last Degree, please contact us for an addendum of additional equipment. As this equipment is incredibly specialized and crucial to your success, please call or email the Gear Department with questions.

Traveling

Description
Click to Reserve/Buy Item
Travel Towel & Soap (Optional)

Travel Towel & Soap (Optional)

Optional. A small quick drying packable towel and a small bottle of soap/shampoo can be nice to have for personal hygiene in case of a weather delay at Union Glacier.

Travel Clothes

Travel Clothes

Clean 'town' clothing is recommend for use traveling as well as pre-and-post trip. We recommend bringing a comfortable variety of clothing for peace of mind, including some t-shirts.

Small Duffel

Small Duffel

This item can double as carry-on luggage for your flight, and is used to store any items you do not plan to take into the mountains. Think light and simple, with 40-50 liters of total capacity. Bring a travel lock for peace of mind.

Rental Agreement Terms and Conditions

I promise to return all equipment rented from Alpine Ascents International, Inc. in good condition at the end of my climb/course. I agree and authorize Alpine Ascents International, Inc. to charge my credit card on file for repairs and/or replacements of damaged, lost or stolen gear. And I agree not to hold Alpine Ascents International, Inc. responsible for any injuries incurred through the use of its rental equipment.

Rental Information

Reserving: Please submit one reservation per person per departure. We recommend submitting reservations at least one month in advance to ensure adequate time for processing. Incomplete reservations may cause delay or failure to reserve requested items. Cancellations must be made three weeks in advance of your departure.

Washington Rentals: All rental equipment for trips taking place in Washington will be picked up during your gear check at our Seattle headquarters. For trips with an off-site gear check please contact the Gear Department to pick up your rentals in Seattle. At that time, payment will be taken for all rented items. No security deposit will be charged for Washington rentals; however, Alpine Ascents reserves the right to assess fees for the replacement or repair of any damaged items.

Alaska Rentals: Due to the unique nature of Alpine Ascents' Alaska program, some items requested may be picked up in Talkeetna at your gear check rather than shipped directly to you. However, not all rental items are available for pickup in Talkeetna. Payment for Alaska rentals will be charged to the on-file credit card after your gear check, including a $50 security deposit per item. Alpine Ascents reserves the right to withhold all or part of your security deposit for the replacement or repair of damaged items. All equipment, whether shipped to you or picked up in Alaska, may be de-issued at the Alpine Ascents Alaska facility at the end of your trip.

International Rentals: All rental equipment for trips taking place internationally will be shipped to you approximately two weeks prior to your trip departure date. A USA address must be provided for rental shipments. Rental equipment may not be shipped internationally. At the time of shipment, charges will be assessed to the credit card on file, including shipping charges, rental fees, and applicable security deposits. Please immediately contact the Gear Department with any questions.

Confirmation: Allow 48-72 hours for rental confirmation via email. If you have any questions or have not heard back from us within three (3) working days, please email [email protected] or call (206) 378-1927 and ask for the Gear Department.

Payment: The credit card on file will be used to process rental payment. For climbs in Washington, payment will be taken at your gear check and no security deposit will be required. For climbs taking place outside of Washington, charges are processed at the time of shipment (approximately two weeks prior to departure date) and will include a $50 security deposit per item plus shipping. Shipping cost is based on size and weight and can only be determined at the time of shipment.

Security Deposit: Fees are fully refundable upon a timely return (one week from the end of trip). Fees may be assessed for repair or replacement of damaged item(s). Please allow up to two weeks for your refunded to be credited. Please note that for items not returned within one week after a trip end date Alpine Ascents reserves the right to withhold all or part of your security deposit.

Shipment: Rental items for climbs taking place outside of Washington are scheduled to ship two weeks prior to your trip departure. Once received, please verify that all items are correct and fit appropriately. Please note that sizing information provided is used to determine the sizes of items shipped. You are responsible for rentals once items are shipped and until items are received back at Alpine Ascents. We encourage you to insure your shipment.

Organizing for Antarctic Extremes

Antarctica can feel warm enough for sunbathing, but frequently lives up to it’s more common image as a frozen continent battered by extreme storms and temperatures well below 0°F. For a safe, comfortable, and smooth journey, read this guide thoroughly as it will help you prepare for your trip.

You need four different types of luggage for this trip:

  • Expedition Backpack – big, comfortable, and sufficient for carrying gear to high camps when we leave our sleds behind.
  • Sled Duffel Bag – the biggest, burliest duffel available. Think 150-liters in size.
  • Ilyushin Carry-On – 20-30 liters in size, this will be used for your flight to the continent aboard an Ilyushin IL-76.
  • Small Duffel – useful as a carry-on when traveling to Chile, and useful for storing belongings at the hotel.

How do these four kinds of luggage work together? Read below to understand the trip flow.


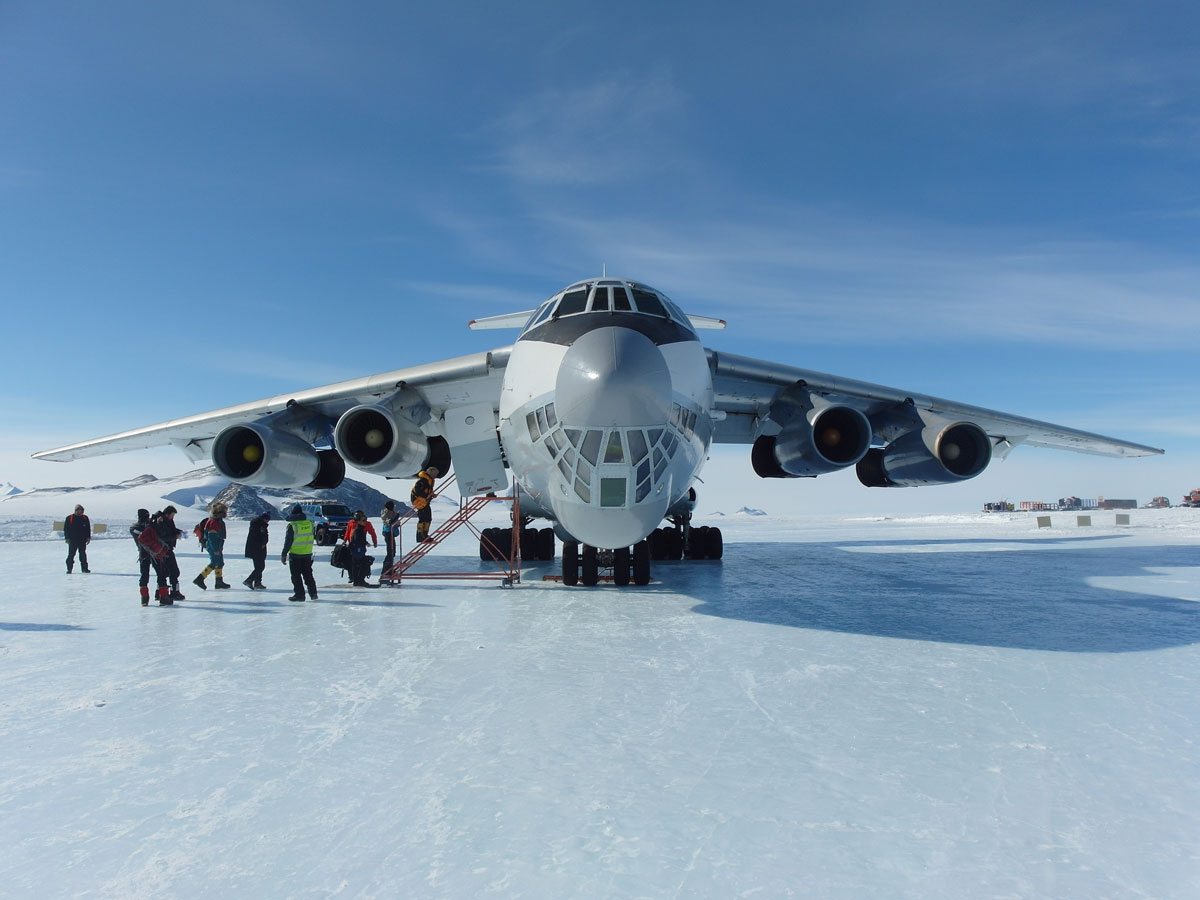
Stage 1 – Travel to Chile

Pack everything (except for a few items mentioned below) into your sled duffel and check it in with your airline. Your expedition pack should be flat-packed inside of the sled duffel.

Pack your small duffel as your carry-on, and remember any usual comfort items for international air travel. Staying relaxed prior to your expedition will contribute to your success on Mount Vinson! Pro tip: we fly with our high-altitude boots and insulated pants in our carry-on baggage. These items are difficult to replace in Punta Arenas.


Stage 2 – Trip Prep in Punta Arenas

Windy but temperate during climbing season, Punta Arenas is on the Straits of Magellan. It’s nice to have a small selection of town clothes with you, suitable for walking along the water or tackling any pre-or-post trip travels. After landing at the airport, we complete a thorough gear check and try to finish packing before the next day’s luggage weighing and check-in. Here’s how we pack:

  • Small duffel – anything not flying to Antarctica can remain with you for the night. Before flying to Antarctica, you’ll check this in with your hotel and it will be stored until you return.
  • Ilyushin Carry-On – pack this small bag with essentials for the flight to Antarctica. Prescription meds, glacier glasses and goggles, a warm hat, gloves and mittens, sunscreen, and your passport.
  • “Go” Pile – we make a pile of gear we’ll wear onto our flight to Antarctica: expedition boots (with a pair of socks), softshell pants, baselayer top, and expedition parka.
  • We flat-pack our expedition backpack into the bottom of our sled duffel along with every other expedition item. Anything that goes in this duffel will be inaccessible from check-in until our arrival at Union Glacier Camp (UG, for short).

weighconStage 3 – Flight Check-In, Briefing, Etc.

First thing in the morning, we weigh and then turn in our sled duffels to the flight operator. If weather is good, we’re reunited with our gear the next day in Antarctica (“on the ice”, we say). If weather is bad, it is possible our flight to the ice will be delayed. This can mean hours of delay, or can mean days of delay. It is not possible to recover our duffels during this time, so pack carefully!

In our street clothes, we also attend a logistics briefing with the other teams flying in the Ilyushin, explore Punta Arenas a bit, and enjoy a final night in civilization.


Stage 4 – Flight to Union Glacier (UG)

After turning over our small duffels to hotel storage and settling up for our rooms, we head to the airport and board the plane to Antarctica. We’re dressed for the cold, as the Ilyushin cabin is unheated, wearing: expedition boots, baselayers, softshell pants, and glacier glasses. We carry with us our Ilyushin Carry-On pack with absolute essentials, and typically sling our expediton parkas over our shoulders. It’s important to pack a hat, goggles, and warm handwear in your carry-on in case a storm is brewing on arrival.


Stage 5 – Hop to Vinson Base Camp (VBC)

After loading our sled duffels into the Twin Otter bush plane, we hop an hour to Vinson Base Camp. The weather is typically colder and harsher the further into the continent we go, and we likely take this flight with a few more layers on. It’s common to wear a hat, gloves, and our expedition parkas for the short flight to the base of our objective.


mountaincon
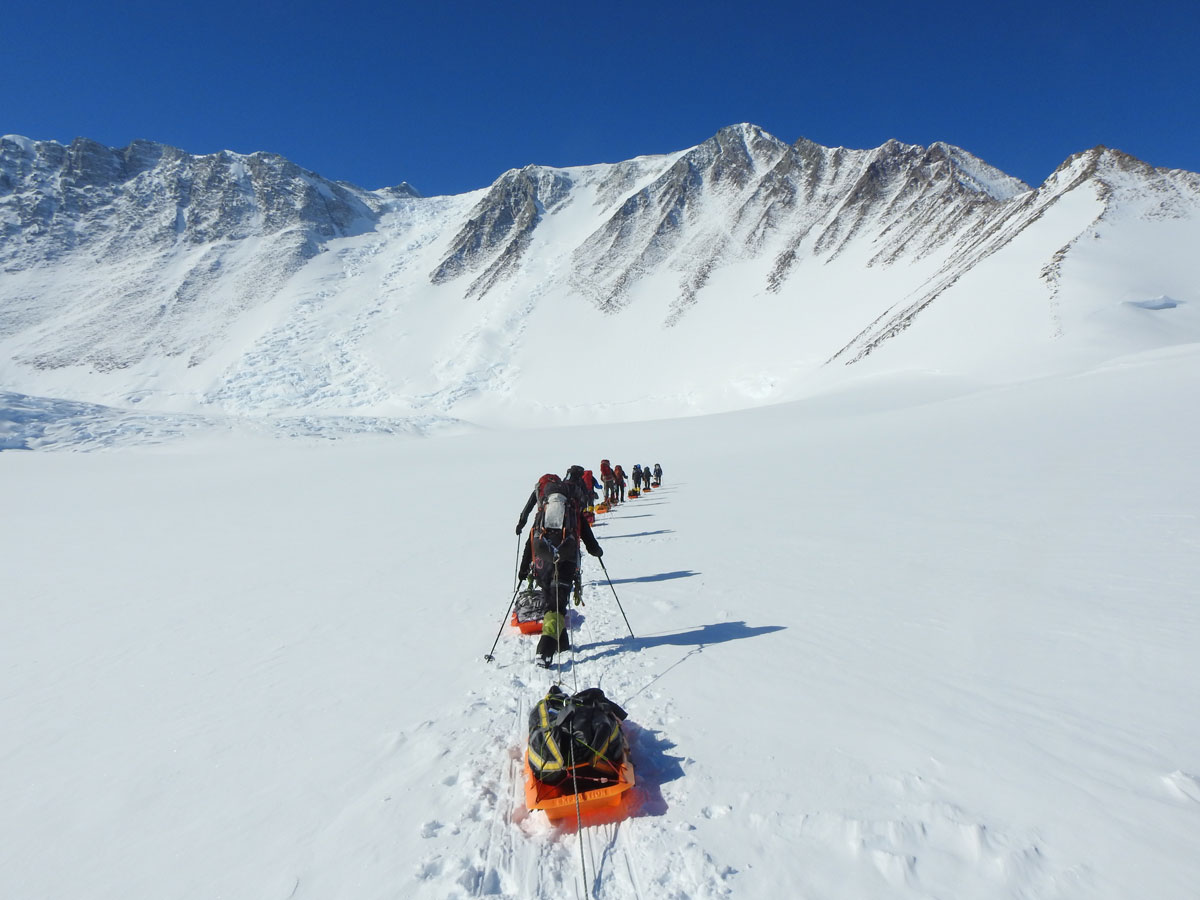
Stage 6 – Climbing the Mountain

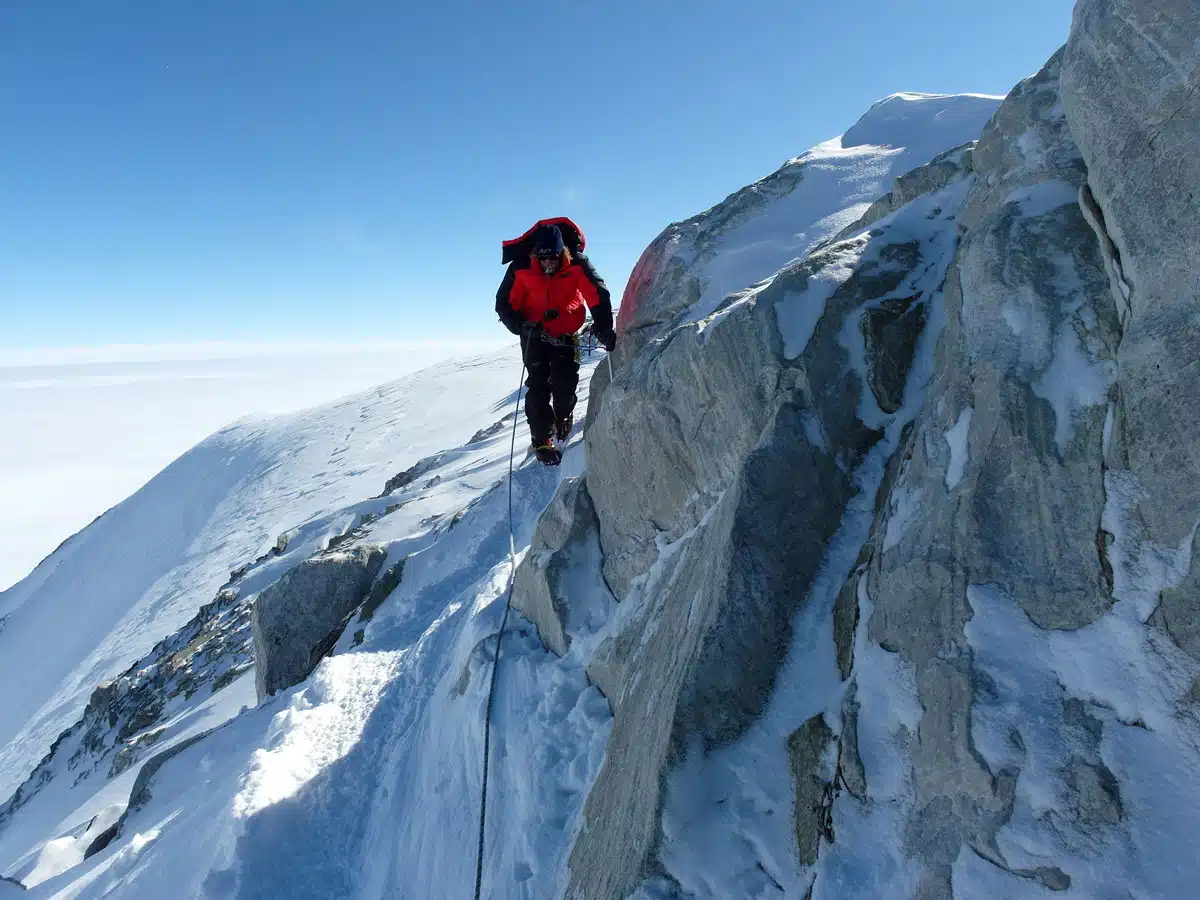
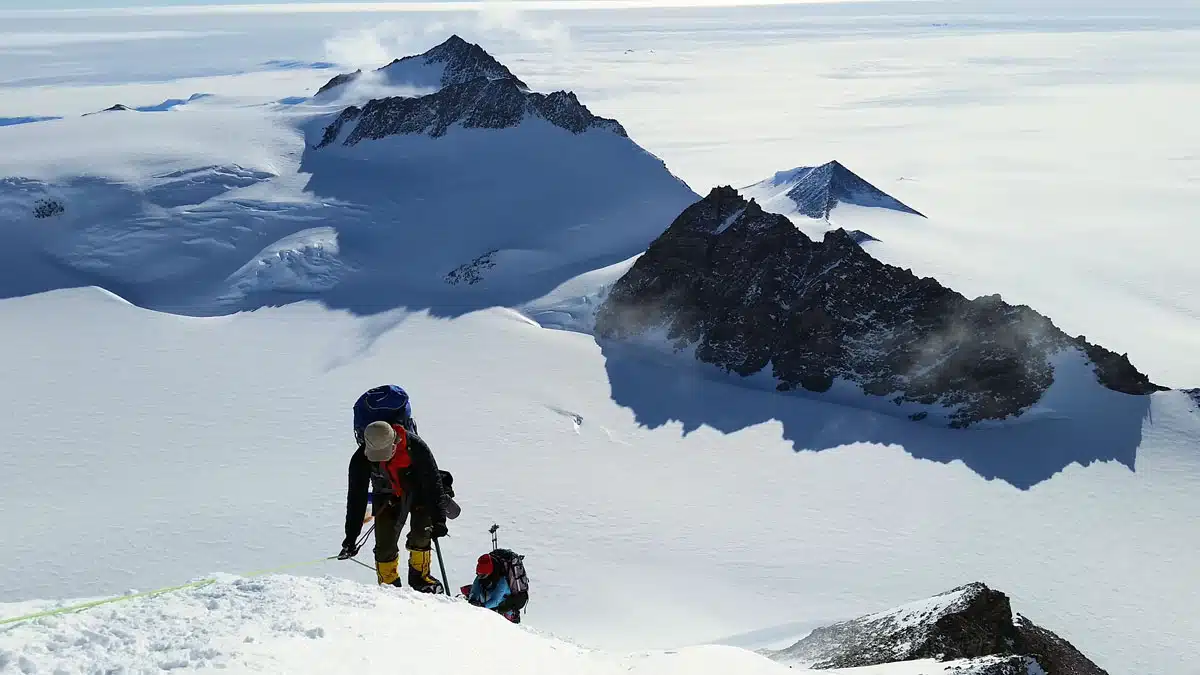
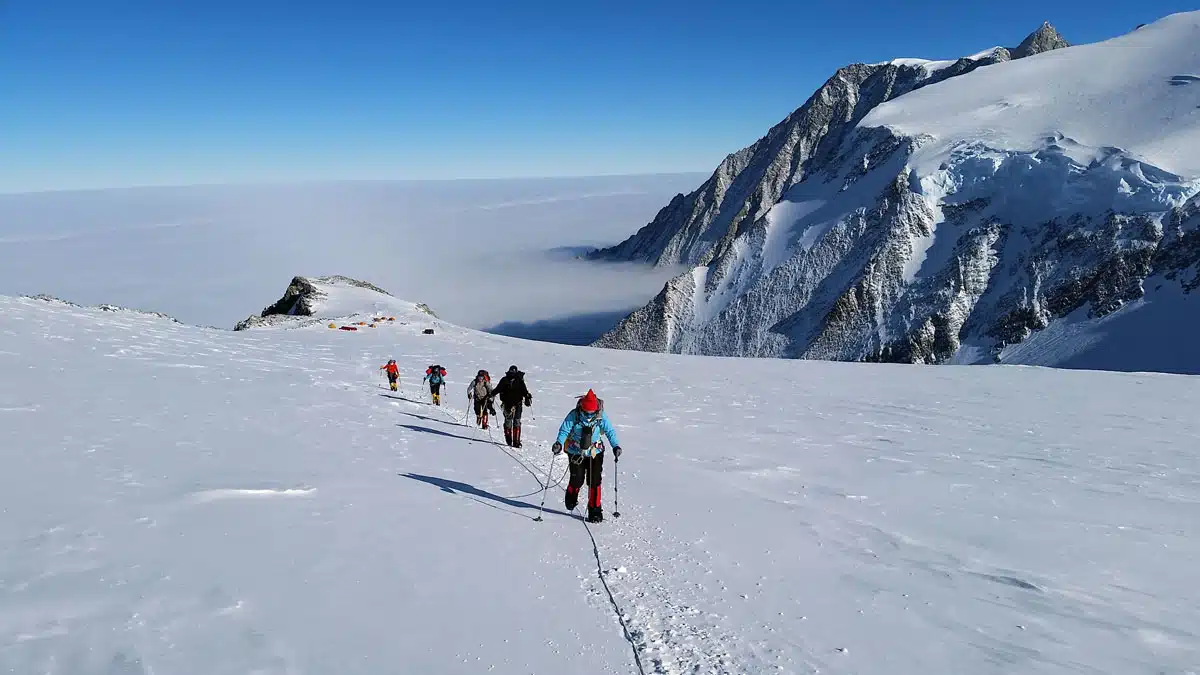
From VBC onwards, we tow our sled duffels in sleds (up to the fixed lines), which along with our expedition backpacks contain every stitch of equipment and calorie of food we’ll need to safely climb Mount Vinson. We’ll stash our Ilyushin Carry-On bags in a cache in the snow, as they won’t be of use to us on the upper mountain.

After the climb has concluded, we’ll reverse the process, all the way back to Punta Arenas.
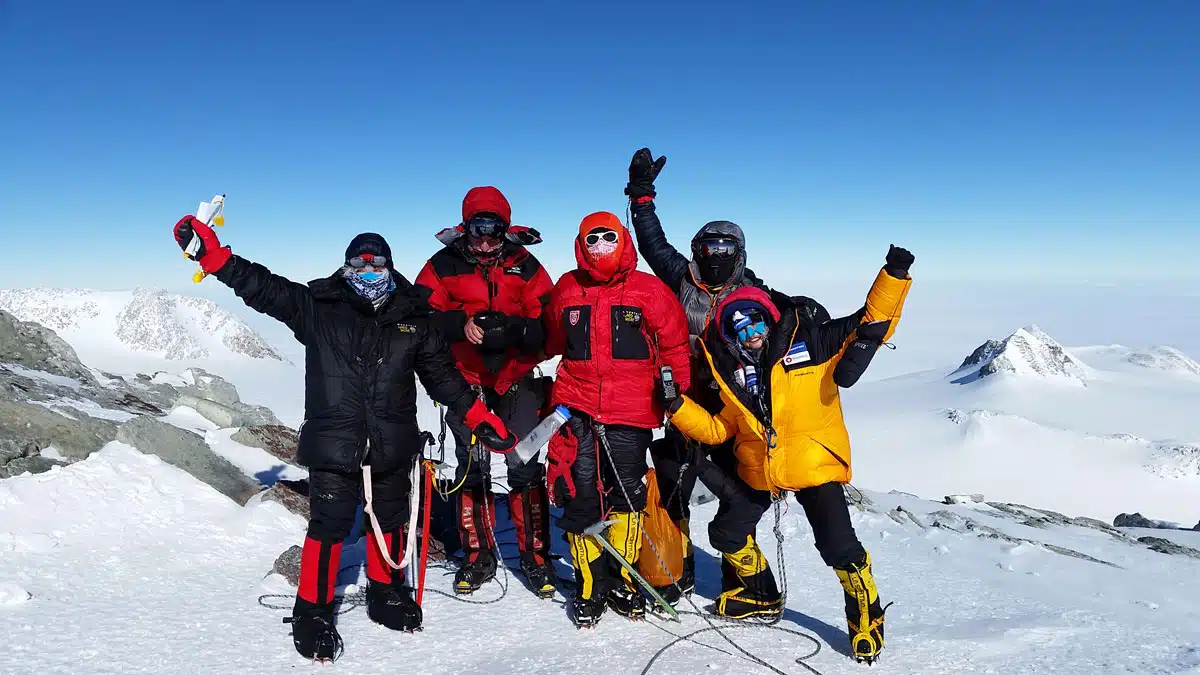


An absolutely incredible expedition. Highly recommended for any serious mountaineer and these are certainly the people to go with.

Disembarking on the ice from our Illuyshin 76 private jet. Mount Vinson, Antarctica. Photo: Monika Witkowska
Moving to Base Camp from our Twin Otter landing strip. Mount Vinson, Antarctica. Photo: Monika Witkowska
Mount Vinson, Antarctica. Photo: Monika Witkowska
Neighboring Mount Shinn from High Camp. Mount Vinson, Antarctica. Photo: Monika Witkowska
High Camp. Mount Vinson, Antarctica. Photo: Monika Witkowska
Summit Ridge. Mount Vinson, Antarctica. Photo: Monika Witkowska
Vinson Summit. Lakpa Rita Sherpa becomes the first Sherpa to summit Mount Vinson, and the Seven Summits. Photo: Andy Tyson
Plenty of daylight. Mount Vinson, Antarctica. Photo: Monika Witkowska
Mount Vinson, Antarctica. Photo: Monika Witkowska
Climbing towards summit ridge. Mount Vinson, Antarctica. Photo: Monika Witkowska
Ralaxing at Union Glacier Camp. Mount Vinson, Antarctica. Photo: Monika Witkowska
Mount Vinson, Antarctica. Photo: Monika Witkowska

ALPINE ASCENTS BLOG

  • The Art of Choosing What Goes into a Pack for Fast and Light Alpine Style Objectives

    by Bobby Cosker Things to consider when packing for bigger objectives. Martha Stewart once said, “life is too complicated not to be orderly.” The same couldn’t be truer when discussing the topic of what to consider when packing your backpack for alpine climbing in the bigger mountains. Being thoughtful and orderly in how and what […]

  • 2023 Denali Season Review

    by Jessica Flandro When I, a member of the logistics team, first arrived at the Alpine Ascents office in Talkeetna, Alaska to begin preparing for the upcoming climbing season there was an unseasonable amount of snow still on the ground and more winter storms forecasted over the coming weeks. Ever the optimists, we assumed the […]

  • How To: Prepare for a Glaciated Climb

    By David Shuer  After seeing Tahoma (Rainier) from your flight into SeaTac, or reading Into Thin Air, or living in the Pacific Northwest looking up at the volcanoes that dot the skyline, you’ve got the bug and want to climb some glaciers. The options are endless in the PNW; ranging from small pocket glaciers and […]

Partners & Accreditations

Alpine Ascents International is an authorized mountain guide service of Denali National Park and Preserve and Mount Rainier National Park.
© Copyright 2023 All Rights Reserved. Alpine Ascents International