Blister Prevention
words: Mike Hawkins
Take a few seconds to think of the toughest person you know, or the toughest person you can imagine from your favorite action movie… Got it? This person should probably be covered in mud or have some cuts on their arms and legs, but they don’t care because they’re tough. Still with me?
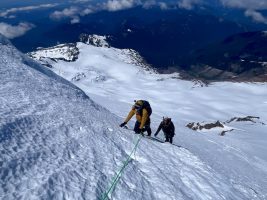
Now imagine them balled up on the ground, whimpering at 8,500’ on Mount Baker, just before the Roman Wall. Nothing is noticeably wrong with them from your perspective, but you recall they were bragging about some legendary ‘hot spots’ earlier in the day. John Rambo has finally met his match with matching half-inch blisters on his heels.
Sure, this is a bit dramatic, but time and again, I’ve seen my toughest climbing partners turn to mush after a little excessive boot friction. Blisters have the power to turn an enjoyable approach into a nightmare, turn a long descent into an overnight bivy, or even put an early end to a climbing trip.
We are on a mission to stop blisters before they start with 47 simple tips.
Fight for the Fit
It turns out Shoe Carnival and Nordstrom don’t carry mountaineering boots. For most climbers, this adds an extra challenge to finding and purchasing the perfect pair of mountain boots. Big online retailers like REI are willing to ship to local shops at no cost, although mountaineering specialty stores offer better mountaineering boot fitting advice and climbing expertise.
Many climbers choose to rent boots for their first few climbs or climbs with specific boot requirements. If opting to rent, plan to try on a few different sizes and take the time to determine which size will be most comfortable. For the best results, bring along your favorite footbed to try on with your boots – keep in mind, the additional volume from an added footbed can affect the comfort or fit of your boot.
Adding after-market footbeds like Superfeet can help with blister prevention in a few ways. They reduce movement around the center of the foot by supporting your arches and keeping them from collapsing when fatigued. Footbeds may also help secure your heel into place in a boot with a wider heel cup.
Lace ‘Em Up
Be diligent with lacing right from the start of each day. Do the boots feel a little looser than you’re used to? Take the time to redo them before walking or climbing even shorter distances. You will get the best results from tying your boots in a standing position.
First, ensure a snug fit on your lower foot, taking care that your in-step and heel are snugly secured into position. Utilize ‘lace-locks’ about halfway up the boot if available. Lace locks help keep the lower laces nice and tight while lacing the upper boot. Lace-locks can also be used to allow variability in how tight the upper boot is laced – careful here, as a loose upper boot could lead to more movement and the potential for more blisters. Next, snug up the upper boot and double knot your laces so they won’t come untied for the rest of the day.
Walk The Walk
Traditional footwear is designed to bend and conform to our feet as we walk. Our shoes bend in the center as we step forward and lift our heels during normal strides, minimizing movement between our heels and our shoes.
Mountaineering boots are not designed to bend.
Since mountaineering boots will not bend and conform to our feet as we walk, changing how we walk in the boots is the next best way to reduce movement, especially in the heel area. Instead of taking long, rolling strides, consider taking smaller steps, placing the surface of the sole flat on the ground. Think Frankenstein’s walk.
Soft Feet
Some feet are more prone to blistering than others. Whether or not you have a history of blisters, toughening up your feet during training can be helpful. Mountaineering boots don’t break in quite as much as we are led to believe; usually it’s our feet that are adapting to the boots.
Whether you are planning to rent boots for your climb or you are unable to train substantially in boots you already own, take the time to train with some other stiff backpacking-style boot to help prepare your feet. Running shoes or your favorite comfortable hiking shoe are not likely to help develop the necessary toughness.
Retail Therapy: Blister Care and Prevention
- Liner Socks (or dress tights): These thin socks fit snugly under your hiking sock and wick moisture away from your feet. They also reduce the amount of friction on your foot by providing a thin barrier between your foot and hiking sock.
- Glacier Gel: Super sticky and comfortable, these go directly on a blister to pad against rubbing and pressure points.
- Leukotape: Sticky tape to add a friction barrier between your foot and hiking sock. Works well on hot spots, but not recommended directly on blistered or broken skin. For use over a formed blister, cut Moleskin to size and place Leukotape over the top to help keep Moleskin in place.
- Moleskin: This is a popular, compact option. It isn’t as sticky as Leukotape, but it adds a friction barrier and a small amount of padding for hot spots. For formed blisters, cut into the shape of a donut so the donut pads around the outer edge of your blister. This shifts pressure and friction from the blister to the Moleskin donut.
- Duct Tape: Some climbers prefer this to Moleskin and other blister pads because it is often on hand in repair kits and is very versatile, though blister-specific options are a better choice for serious blister prevention and management.
Blister Management

For best results, stop and tape hot spots as soon as you notice them. Plan ahead to keep your feet and socks dry. Wear gaiters for wet approaches or in softer snow to keep moisture from coming into your boots. Choose the proper socks for conditions to keep your feet from getting excessively sweaty. Sometimes a thin hiking sock is the correct sock for mountaineering in warmer weather.
If you give sufficient time and energy to blister prevention and management, you might just beat John Rambo in a foot race.