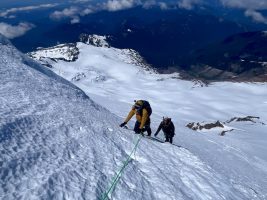
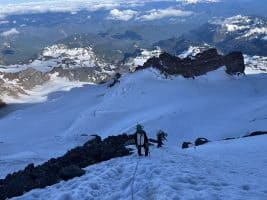
by Lyra Pierotti, Alpine Ascents Senior Guide
Outdoor equipment has certainly evolved from the days of external frame backpacks and wool knickers, but the goal is the same: Minimize the stuff you’re carrying and you can go further, higher, climb harder, ski more fluidly, enjoy the movement—so long as you have everything you need.
As climbers, we still have to carry an inordinate amount of heavy equipment, much of it made of metal. And while aluminum hasn’t changed its atomic weight for the purposes of lightweight mountaineering, technology certainly has helped to trim the excess ounces anywhere possible.
With all the ultralight gear out there, you could fill your pack entirely with the lightest equipment in the history of mountaineering—and that would solve the problem, right?
Not exactly. Technology is great, but simplicity is better. As guides, we value lightweight, but also durability–and sometimes these two factors are at odds with each other in the latest ultralight gear.
Fortunately, there’s another way to lighten your kit–through thoughtful examination of your systems and the way all of your gear works together.
So, where do you start?
Step 1: Shrink your sleep kit!
The best bang for your buck is in updating your sleep system. A very high quality down sleeping bag will compress impressively—so ditching that old synthetic sleeping bag is a great way to start.
Next, get a warmer sleeping pad! Many people don’t realize that your sleeping pad also keeps you warm—your body compresses the down underneath you, so your pad also needs to have some insulating properties. This is reported in “R” values, where a higher number indicates a warmer pad. A strategy often employed by guides is to actually carry two sleeping pads, a foam one for durability and insulation, and an inflatable one for insulation and comfort. This may sound excessive, but a warm and comfortable night’s sleep is a very precious thing in the mountains, and those foam pads are incredibly lightweight and add a lot of comfort for other tasks around camp.
I certainly cannot prescribe the right system for you, but here is mine for reference–and I am a cold sleeper. As a full time guide in Washington’s Cascades (including May and September on Rainier, summers in the North Cascades, and winters ski touring statewide), I have a 20 degree sleeping bag and a zero degree bag. I also have a foam sleeping pad and two inflatable sleeping pads–one very warm, and one very lightweight and less warm.
(Fun fact, the lighter inflatable pad is a women’s specific pad which is designed to be warmer and cut smaller so I get more warmth for less weight for a pad sized appropriately for my smaller stature!)
All of these bags and pads can be cobbled together in different ways throughout the year. I love it when I am able to swap into my 20 degree bag and just bring my warmer sleeping pad in the late spring because that cuts down on a lot of bulk in my backpack without sacrificing warmth.
Investing in two sleeping bags and two sleeping pads is obviously a lot, and you may not need all of the options this affords you. If you’re primarily mountaineering in the summer months but you’re worried about being warm enough, the take home point here is to consider not just the warmth of your sleeping bag but also that of your pad. Consider going a bit lighter on the bag and warmer on the pad, add a ¾ length foam pad, and you may find that you’re able to significantly reduce the amount of bulk and weight in your sleep kit.
Ok, now that your sleeping bag doesn’t take up half of your backpack, we can move on to the next most important step in downsizing your pack.
Step 2: Commit to a smaller pack!
Yep, that’s it. Commit! I have found many times that when I take a 70 liter pack on a climb that I could probably manage with a 55 liter pack, I carry 70 liters worth of stuff. Pay attention to your habits! If you think that you “have the space” you will think less critically about each item you throw in your pack and end up carrying more. It’s a well documented phenomenon amongst guides as well. No one is immune to the temptation to bring more stuff.
Be reasonable about your pack size, however. Don’t get yourself a 35L pack for a 4 day climb of the Emmons on Mt. Rainier and expect to get everything you need in it. That gear list calls for a 75-100 liter pack, so commit to the 75 liter size and start practicing getting everything you need into it, accounting for group gear as well.
Once you have your ideal pack size picked out, the next step is to assemble your kit!
Step 3: Make sure your gear earns its spot in your pack!
When I first got into backpacking, a mentor at my university’s recreation program said to me, “When deciding what to bring, make sure every item in your pack has at least two uses on your trip!” As an impressionable 18-year-old, I took this to heart. I fudge a bit now, but I remember these wise words and pause with every item to ask, do I really need it? Can something else take its place and be more useful?
One of my favorite examples is my cooking and eating kit. With big groups, you can share cookware, which helps a lot, so you’re just concerned about your personal items. I carry a very lightweight bowl, a spoon, and a ½ liter “Nalgenie,” as I like to call these little Nalgene bottles–with a beer coozie around it. This combines my coffee mug into my water carrying system and makes use of this item all day instead of just for coffee and tea. It also fits in the pocket of many of my parkas, so if I take coffee to go from breakfast, I can stash it in my warm jacket pocket and it’s almost like having a thermos! See, simple and efficient can still allow for luxuries.
Ok, now that you’ve trimmed the gear you’re taking, it’s time to get it into that small pack of yours…
Step 4: Become an expert packer!
Yes, there is a technique to packing a backpack well, just as there is a technique to walking efficiently for 10 hour days on your feet. This stuff may sound mundane, but it is precisely this attention to detail which makes climbers successful.
First, visualize a well packed backpack. It should look like a smooth cylinder, with the fabric relatively taut, no folds or lumps or empty spaces. The pack should look as if it is full of water. A well packed backpack will be more balanced and allow you to climb more comfortably.
Packing skillfully will also allow you to use mountaineering specific packs which are essentially durable fabric cylinders. They don’t have much in the way of pockets to organize your gear, and likely have just a few straps for carrying bulky items like foam pads and sharps like ice axes. These mountaineering specific packs also have thinner, stiffer padding, and carry closer to your body to facilitate more fluid movement.
So what’s the skill? Start with something light and fluffy, like your sleeping bag and pad, at the bottom of the pack. Some use a compression stuff sack to make it small, but sometimes you can forgo the stuff sack (if your sleeping bag isn’t too aggressively lofty) and stuff things on top of it. (The first method is best for expeditions where organization is important, the latter is my go-to for highly technical fast-and-light ascents in the North Cascades.)
Now start to layer in heavy items that you won’t need to access until you get to camp. Pack these close to the back panel. Try to keep all of your heavy items in a space roughly like a right triangle–where the base is level with your low back, and tapers up toward your shoulders.
Maybe you’ve seen that classic demo showing how to get the most rocks of all sizes into a jar? You start with the big ones, then fill smaller ones in the spaces between. Visualize this as you finish packing. Keep layers and water and snacks for the day close to the top, and start shoving the rest as deep and forcefully as you can. Use open, flat hands with fingers together to stuff soft items into the tiniest spaces. Just in case you need that hard shell or big parka, keep a sleeve trailing up toward the top of the pack so you can stuff it low but yank it out in a hurry.
And last but not least, be willing to partially unpack and repack at breaks! Always choose a safe location to explode any of the contents from your pack, but if it is safe to do so, it will behoove you to be a fast and frequent packer!
Step 5: What about that flashy lightweight gear I want to justify buying?
Now that you have examined your gear through these systems approaches, we can start to discuss going lightweight with the rest of your gear. Note that this is largely fine-tuning and starts to require that you have a quiver of 4 crampons, 3 ice axes, 3 harnesses, countless backpacks, etc. to choose from, and that gets expensive. This is not necessary for many objectives, and there is plenty of gear that will do a variety of things well enough. But if you’re getting out more and more, perhaps you’re starting to develop some opinions and preferences, and a budget for your growing gear habit…
Several years ago, on the heels of a very real overuse injury from carrying too many heavy packs (no joke, I compressed my spine!), I started to take a very critical look at my pack weight. I decided to invest in one ultralight specialty item at the start of every guiding season.
My injury had resulted in neck pain, so I bought a brand new, ultralight foam helmet. I was still just thinking about keeping my overall pack weight down, but I realized that my tiny little neck muscles felt relieved with such a light helmet on–it was so comfortable, I nearly forgot it was on! This opened my eyes. The next year, I bought ultralight trekking poles, thinking about all the times I swing my arms in a given day. And the year after that I finally upgraded my old, heavy mountaineering boots to a lighter version.
When you start to invest in specialty lightweight gear, it is most important to consider what movements you will be doing the most, and where weight savings will be most valuable. Boots are a great priority–think of how many steps you’ll be taking!
Often lightweight hard goods are a compromise in durability, so when I am trying to go “fast-and-light” on a climb which is challenging for me, I will select my gear carefully. And when I’m going to scratch around on mixed rock and ice climbs, I’ll be sure to bring my heavier steel crampons to avoid turning my nice aluminum ones into a very expensive “one-time-use” product.
We get it, guides are gear-heads, too.
But first and foremost, we have learned how to be comfortable with simple, efficient systems, create redundancies, and bring only what we need for the conditions. You may not need to go out and buy the latest and greatest in lightweight gear. If you put things together with some care, you can make a lot of gains–or rather, losses–to your pack size with minimal new gear purchases.
So get creative with your equipment, and more importantly, get out there!